SMTP2GO has a feature called webhooks that lets you get notified when specific events happen for the emails you send out. For example, you could get notified when an email is delivered, reported as spam, bounced, or opened by a user.
Now imagine using those notifications from your emails and integrating them with hundreds of other apps you’re already using to automate your workflow.
In this post, we’ll show you how to combine the flexibility of SMTP2GO webhooks with the power of an automation service called Zapier. You’ll learn about the data that is available to you via an SMTP2GO webhook and how to create your own webhook service with Zapier.
Let’s jump right in.
What are webhooks?
Webhooks are a way that apps can send automated messages or information to other apps. They’re a simple way your online accounts can “speak” to each other and get notified automatically when something new happens.
From a technical perspective, webhooks are HTTP calls that trigger when some event occurs. In SMTP2GO, you can subscribe to several events, like when a user opens an email for example, and get information from the emails that you send out. When that event occurs, SMTP2GO makes an HTTP request with the data to the unique URL of your choosing.
What is Zapier?
If you’re not familiar with Zapier, it’s an automation service that allows you to integrate and automate a variety of different services.
When something happens in one app do something in another app. One example is when you post a photo to Instagram you can have that photo automatically posted to Twitter too. Or in our case, when you receive too many spam notifications, you could notify your support team via Slack to stop sending those emails.
Zapier has integrations with over 1000 apps. Zapier will allow you to take SMTP2GO Webhooks and combine it with their webhook service for automations that really help your business.
Workflow automation examples
Before jumping into the technicalities of how to create webhooks, let’s look at a few examples of how you could use SMTP2GO webhooks and Zapier to benefit your business.
1) Send emails marked as spam to your support team via Slack
This one could be really useful if you’re doing a campaign where you’re sending only a small amount of emails to a certain group. If you’re getting too many complains, whether that be with spam or something else, you can forward it to your team via Slack to check it out.
2) Send emails opened from a specific email into your CRM
This one could be useful if you’re trying to land a sale from a specific person. After a recipient opens an email, you can tell Zapier to enter that email into your CRM and then have your sales team reach out later.
3) Keep track of bounced emails in a separate Google sheet
This one could be really useful to track stats on how many different emails are bouncing. You could then use spreadsheet formula functions to do any extra calculations that you might need for your business.
4) Create a new ticket when you get too many spam emails in your project manager of choice
You can also use Zapier to keep track of numbers in a database. For example, if you get too many spam complaints or non-opens you could create a new ticket for your writing team to check out that email.
Those are just a few quick examples. There are so many apps available to you that your specific use case can most likely be accommodated for. Let’s review the different events and data that SMTP2GO gives you access to.
The events available to you in SMTP2GO
SMTP2GO can fire off 6 different events related to your emails that you’re able to subscribe to.
- Delivered – Triggered when an email is delivered.
- Spam – This event is triggered when a recipient reports your email as spam.
- Bounce – An email bounces.
- Unsubscribe – This one is triggered when a recipient clicks an unsubscribe or resubscribe link. This one has two different cases.
- Reject – This event is triggered when you attempt to send an email to a blocked address – i.e. an address that has previously hard-bounced, reported spam, or unsubscribed.
- Open – An email has been opened.
Along with the events themselves, SMTP2GO sends along a lot of data regarding the event in the webhook. Let’s review all the data that comes along with the event when the Webhook HTTP request is made.
The data available with your Webhook event
SMTP2GO sends a total of 14 different data points when an event fires off. Here are a few of them:
event– The event that occurred. Possible values are “delivered”, “bounce”, “spam”, “unsubscribe”, “resubscribe”, or “reject”.rcpt– The email address the email was addressed to.message– The error message we got (where available).subject– The subject of the email.read-secs– The number of seconds an email was open – in five second increments up to a maximum of 30.sendtime– UTC timestamp of when the email was sent to the SMTP2GO server.
There are 9 other data points that you’d be able to subscribe to like time, sender, auth, host, context, email_id, bounce, and user-agent. To learn more, check out our documentation on webhooks here.
Let’s jump straight into creating out first webhook using the SMTP2GO interface.
Creating your first SMTP2GO webhook
Setup of webhooks can be done on the Settings > Webhooks page in your SMTP2GO Control Panel. Once you’re on that page click the Add Webhook button and then you’ll see a modal appear that looks like the following:
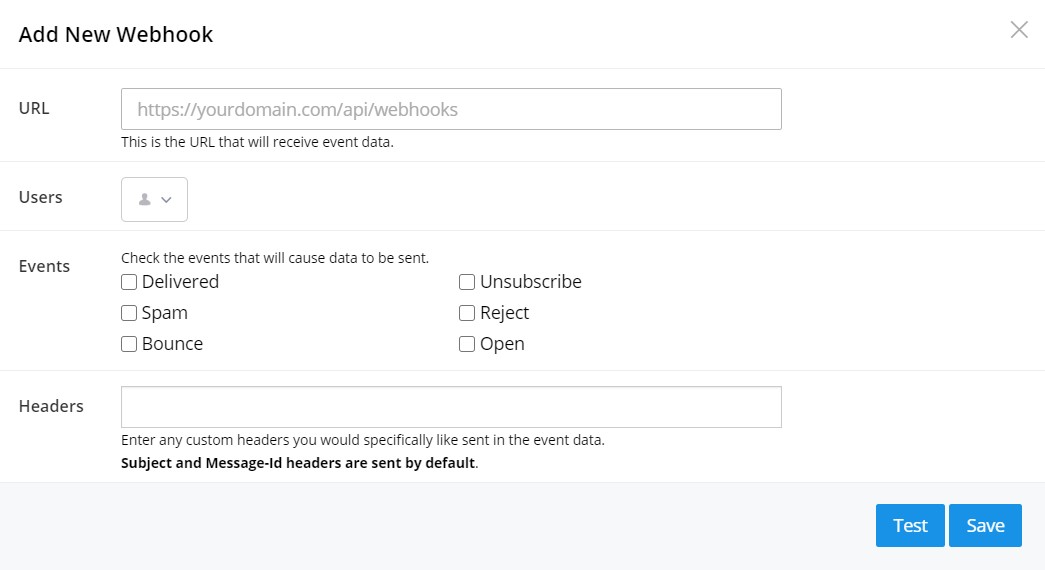
You’ll notice 4 options: URL, Users, Events, and Headers.
The first option is the URL option. This is the custom Webhook URL that we’ve been talking about. All the events and data will be sent to a custom URL that’s entered here.
For Events, you’ll see the 6 events that we talked about in the section above. You can select more than one event to be triggered and send it to the same URL.
The Users option limits the webhook data to specific SMTP2GO users.
Headers is the last option. This field allows you to optionally send any extra custom headers that could be in your email in your event data.
Where can you generate a custom URL for your webhook? This is where Zapier comes in. Let’s jump into setting up our own Webhook service.
Getting a custom Webhook URL with Zapier Webhook Service
One of the integrations that Zapier offers is the Webhook service. It essentially creates a custom URL for you to receive data from any other service without writing code or running servers. If you haven’t already, sign up to Zapier here.
Creating your Webhook with Zapier
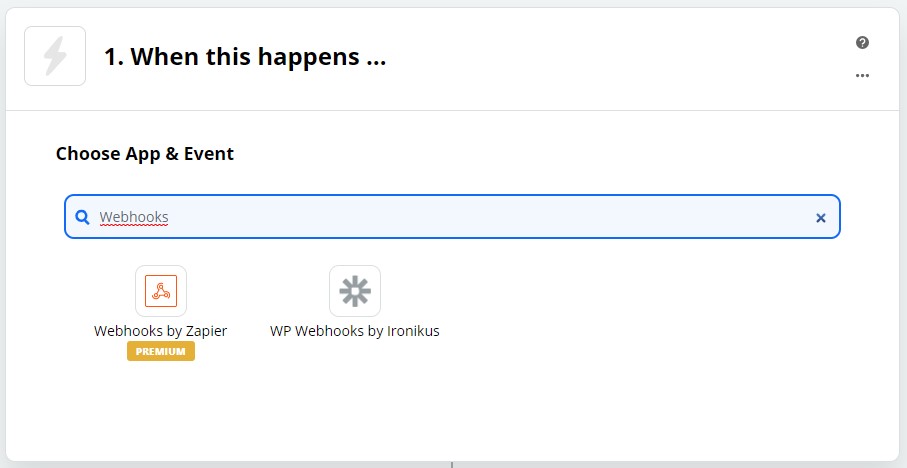
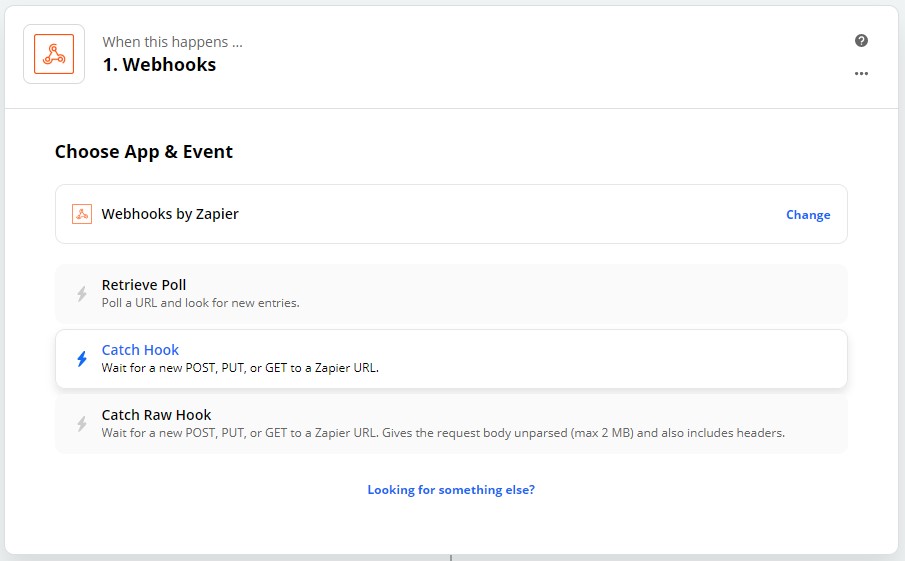
To get started creating your first Zap, click the Make a Zap button. After entering the Zap Editor, choose the Webhooks by Zapier service as your first trigger.
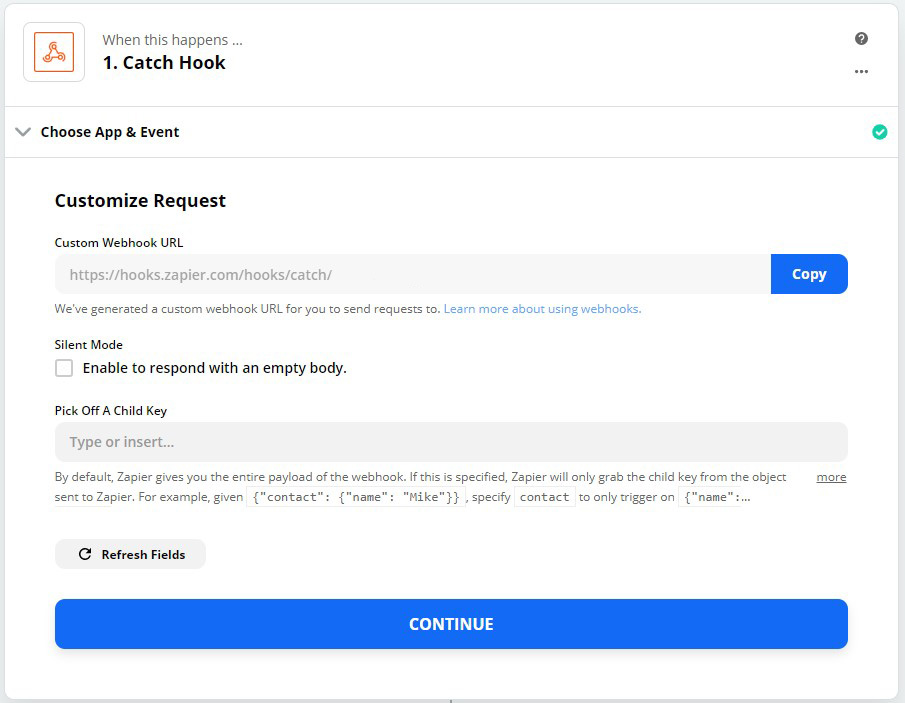
For our purposes, the option that we want to choose is the Catch Hook option. You can skip the optional step. After clicking the Save + Continue button, you’ll notice that Zapier has generated a custom URL for you. This is the URL that you will paste into the modal in SMTP2GO control panel.
After creating your webhook, Zapier will generate a URL for you. You can paste this into the dialog in your SMTP2GO Control Panel.
Testing your Webhook
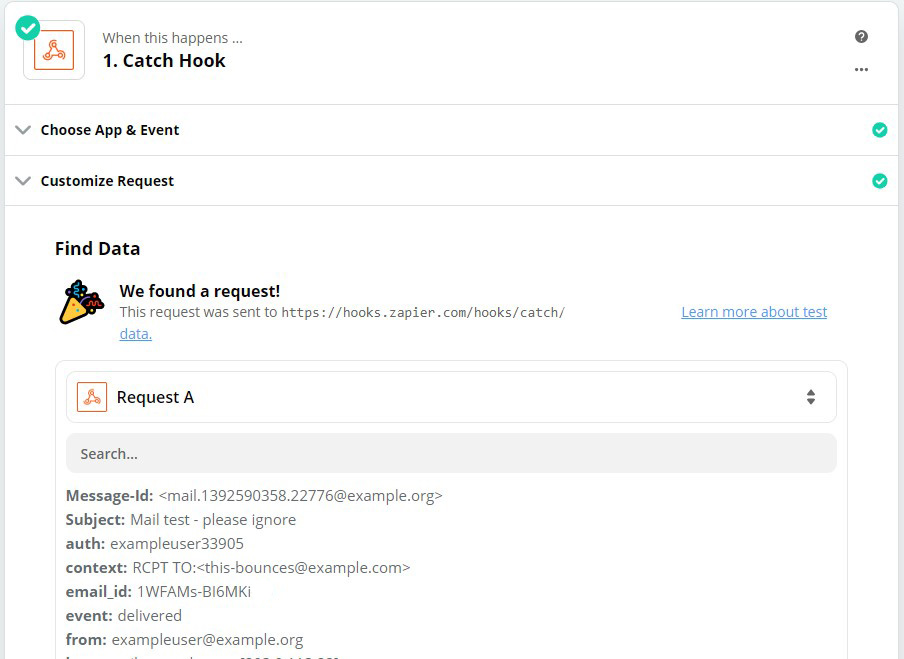
Hitting the Test button in the SMTP2GO Webhook modal will send some test data back to Zapier.
Now, back in the Zapier Zap editor, you can hit the next step and you’ll be able to preview your data. For now, it’s just test data, but you can imagine what this data might look like after something real comes in. It should look something like the following:
Completing your Zap
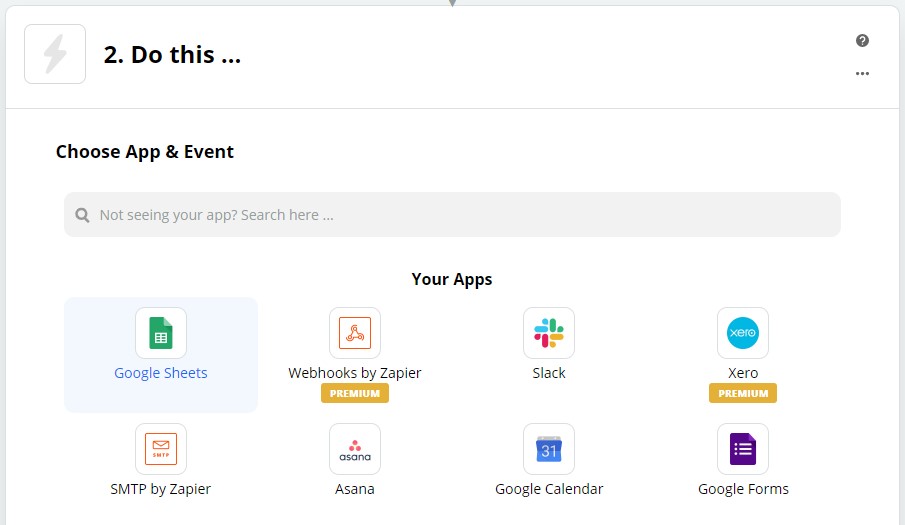
Now that you’ve finished testing your integration let’s finish setting up a Zap. We’re going to set up an integration that tracks opened emails in a separate Google Sheet.
In the webhook that you’re already creating, check the Open event and then hit save. You should now see the webhook listed along with the event you’re tracking.

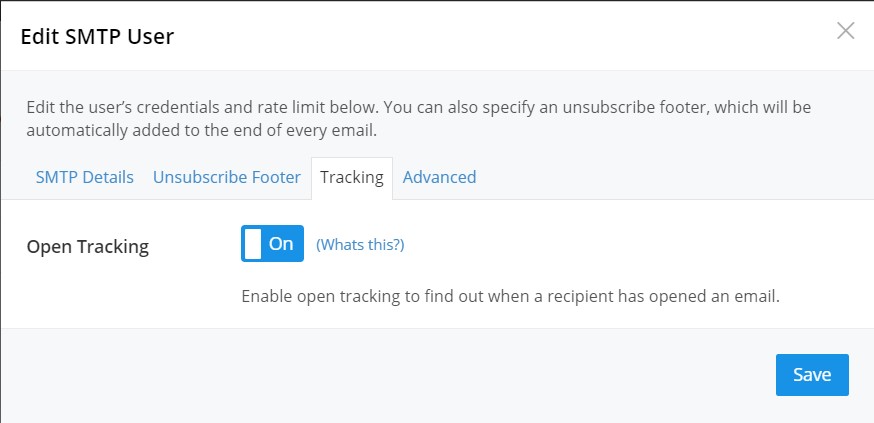
Tracking opens is off by default, but to enable it go to the Settings > Users page in your SMTP2GO Control Panel. Click on the tracking tab and you’ll be able to enable it now.
Now back in Zapier, select Google Spreadsheets as your action. You’ll have to authenticate your account and then choose the spreadsheet. Finally, you’ll be able to edit the template and choose the fields that you would like to enter into the spreadsheet.
Hit Continue, test your Zap to make sure everything works with your Google Spreadsheets account, and finally name and turn on your Zap.
That’s it! You now have a fully functioning SMTP2GO Webhook and Zapier integration working. Whenever a recipient opens it’ll get logged into a Google Spreadsheet. Now you can go back and set up a webhook for any event on your emails, and then have it go into any other app of your choice.
About the author

Charlie Abrahamson
Charlie is CEO and co-founder of SMTP2GO. He started the company in 2006 after a trip to Argentina left him locked out of his own email (every internet café and local ISP blocked his attempts to send). Twenty years later, SMTP2GO delivers email for businesses around the world from its Christchurch, New Zealand base. Charlie has personally configured SMTP relays, debugged deliverability incidents, and led migrations for senders ranging from small businesses to enterprises moving off AWS SES, SendGrid, Mailgun, and Postmark. SMTP2GO is ISO 27001 certified, GDPR compliant and an M3AAWG member.