Integrating SMTP2GO and Exchange Server 2019
This guide provides step-by-step instructions on how to setup your SMTP2GO server as a Connector/Smart Host on Exchange Server 2019.
Note: any additional configuration of this connector is outside the scope of this guide or SMTP2GO support – Microsoft can provide you with support for Exchange 2019
Step 1
Open the ‘Exchange Administration Center‘ (EAC).
Step 2
Login to the EAC as an administrator.

Step 3
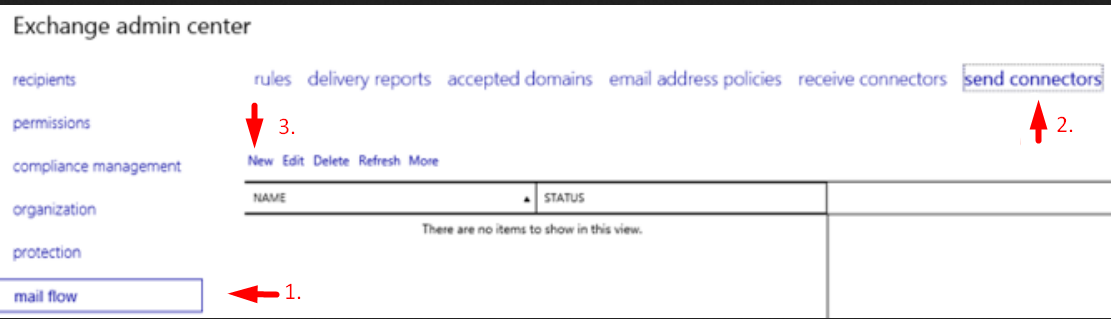
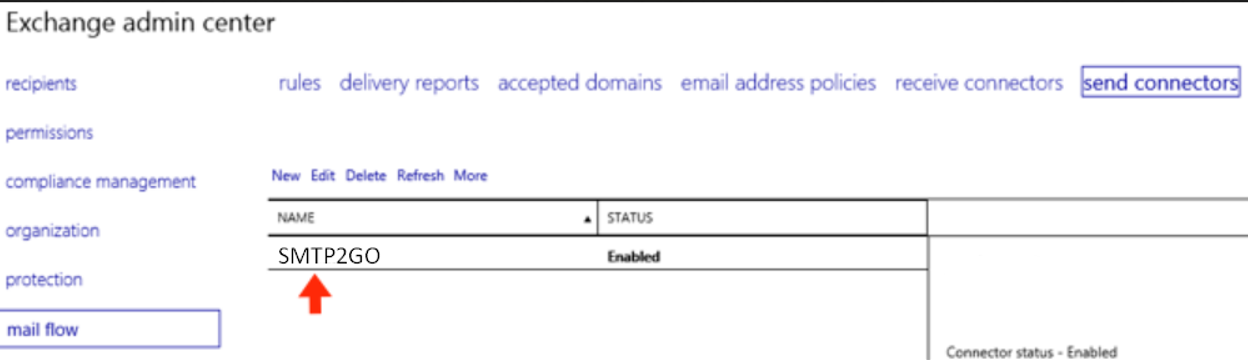
In the left hand column select ‘Mail Flow‘.
Go to the ‘Send Connectors‘ tab.
Click ‘New‘ to add a new send connector.
Step 4
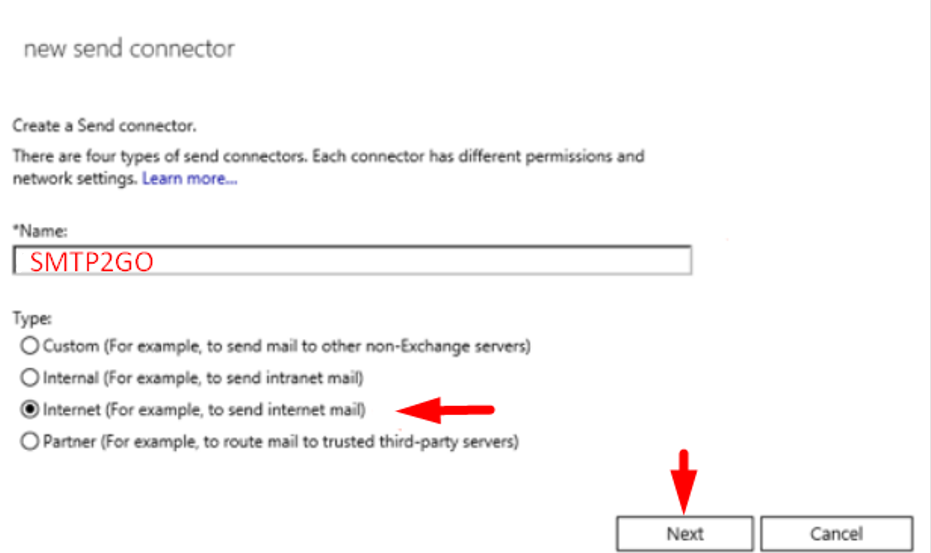
Enter the name as ‘SMTP2GO‘, this is just a reference for the connection.
Set the type to ‘Internet‘.
Click ‘Next‘.
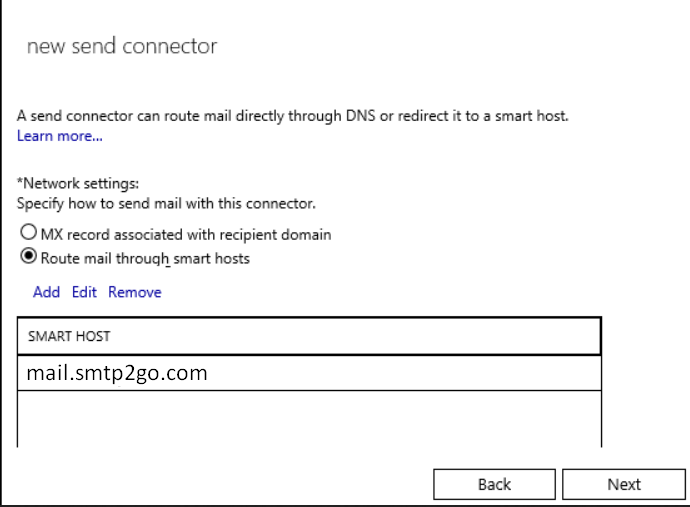
Step 5
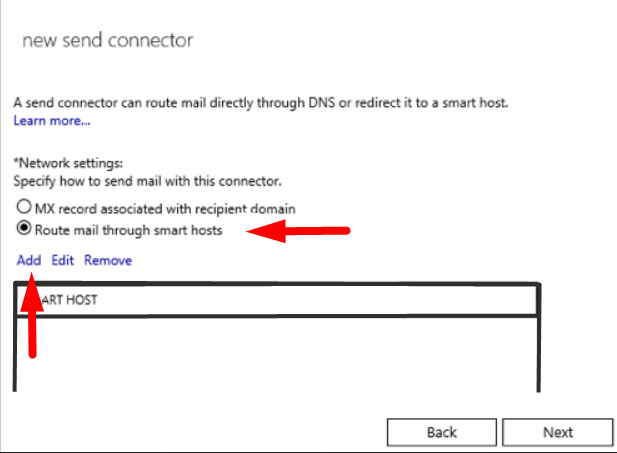
Select ‘Route mail through smart hosts‘.
Click ‘Add‘ to add new smart host.
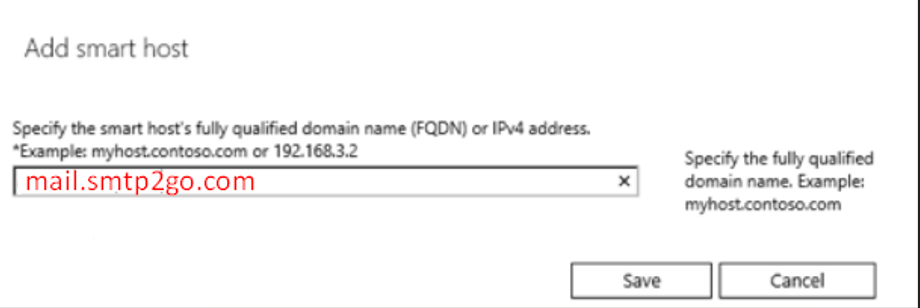
Step 6
Enter the SMTP hostname: mail.smtp2go.com
Click ‘Save‘.
Step 7
The smart host will now be listed.
Click ‘Next‘.
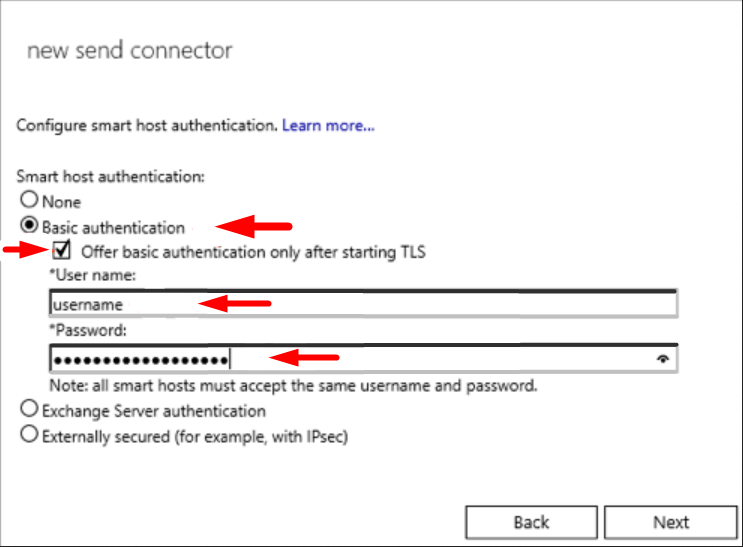
Step 8
Tick the option for ‘Basic Authentication‘:
- Select ‘Offer basic authentication only after starting TLS‘
Enter your SMTP username and password from your SMTP2GO dashboard: ‘Settings > SMTP Users‘.
Click ‘Next‘.
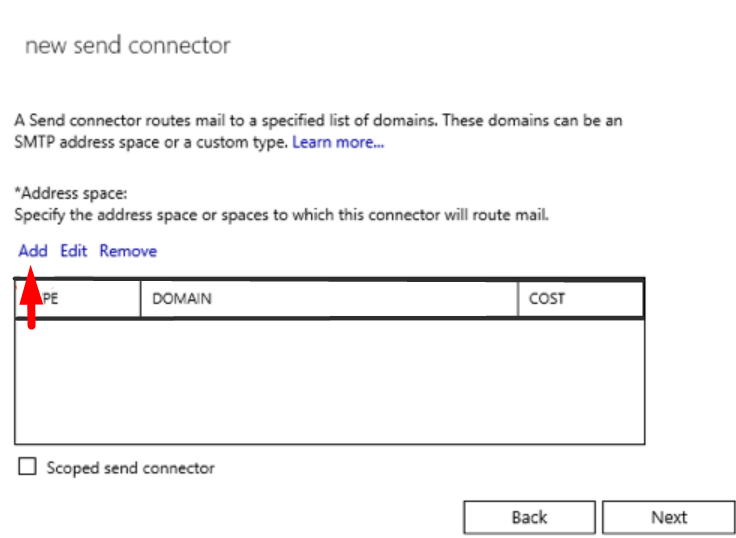
Step 9
Click ‘Add‘ to add a new address space that is allowed to use the SMTP2GO smart host.
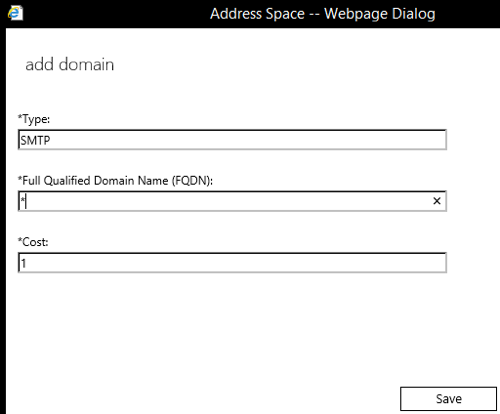
Step 10
Set the type to ‘SMTP‘.
Set FQDN to ‘*‘ meaning all domains.
Set cost to ‘1‘.
Click ‘Save‘.
Step 11
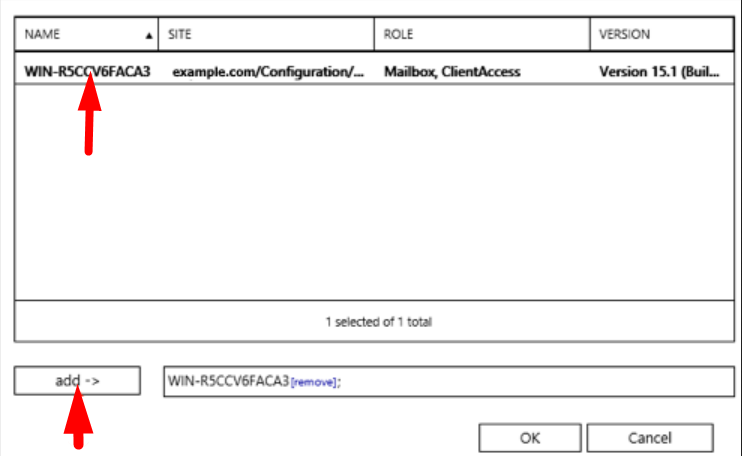
Click ‘Add‘ to add an allowed source server.

Step 12
Click the appropriate server or servers from the list and click ‘Add‘ for each.
Click ‘OK‘.
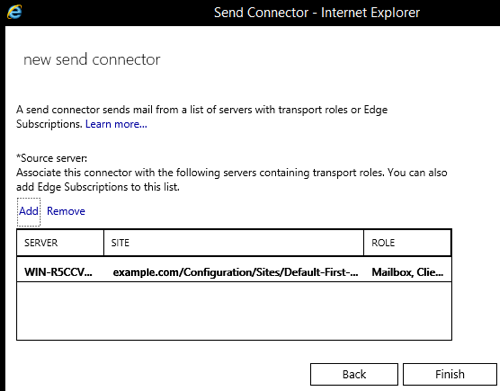
Step 13
Click ‘Finish‘ to save the connector.
Step 14
You may need to restart the Exchange SMTP / Transport services for the changes to take full effect.
Step 15
Optional – update default port
By default, Exchange 2019 will attempt to connect to the SMTP2GO servers on port 25. If you wish to change this to one of the alternative ports you will need to take the following steps.
Ports available at SMTP2GO:
TLS or no encryption >> available on ports 25, 2525, 8025, 587 and 80.
SSL >> available on ports 465, 8465 and 443.
1. Open the ‘Exchange Management Shell‘.
2. Type the following command to get a list of all your send connectors:
Get-SendConnector
3. To change the SMTP port for your connector, enter the following command replacing ‘SMP2GO’ with the appropriate connector name from the Step 4 above:
Set-SendConnector -Identity "SMTP2GO" -Port 2525
4. To confirm the change has been applied, enter the following command:
Get-SendConnector "AuthSMTP"|fl Port
5. You will need to restart the SMTP / transport services on your Exchange server to fully apply and enable the changes.
And that is it! Integrating SMTP2GO and Exchange Server 2019 should be straightforward.
Note: any additional configuration of this connector is outside the scope of this guide or SMTP2GO support – Microsoft can provide you with support for Exchange 2019
You can access reports directly in your SMTP2GO dashboard, which will help you understand delivery successes and failures, tracking information and many more useful metrics. We’ve written some great articles outlining the features of your SMTP2GO account and we recommend taking the time to see everything we have to offer.
Should you need extra help from our award winning support team, we are almost always available to assist. You can find support contact details in your SMTP2GO dashboard and information about retrieving your support PIN here.
Ready for better email delivery?
Try SMTP2GO free for as long as you like:
Try SMTP2GO Free → Paid plans available for over 1,000 emails/month.