This guide provides step-by-step instructions on integrating SMTP2GO and EasySendy Pro.
Step 1
Log in to your EasySendy account.
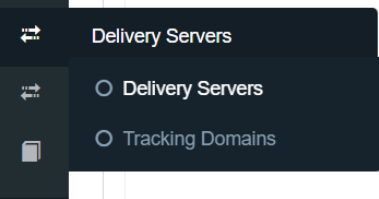
Step 2
In the menu on the left-hand side of the page, go to Servers > Delivery Servers.
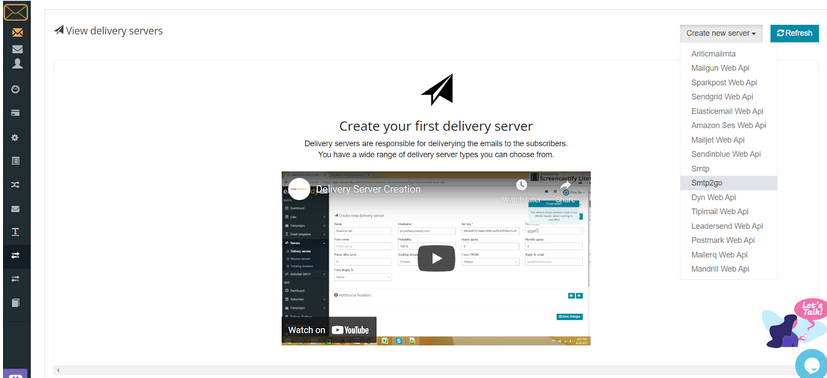
Step 3
On the next page, click on Create New Server, and select SMTP2GO.
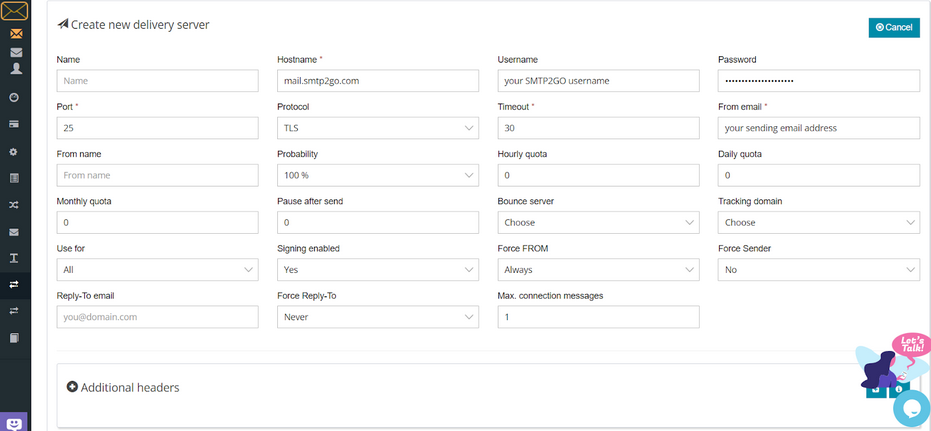
Step 4
Enter mail.smtp2go.com into Hostname.
Enter your SMTP2GO username into Username and your SMTP2GO password into Password.
Note: these credentials are from your SMTP2GO account’s Settings > SMTP Users page.
Set the Port:
TLS is available on 25, 2525, 8025, 587 and 80.
SSL is available on 465, 8465 and 443.
Depending on the port set, you can choose TLS or SSL under Protocol.
The From email is the email address that you want to send from.
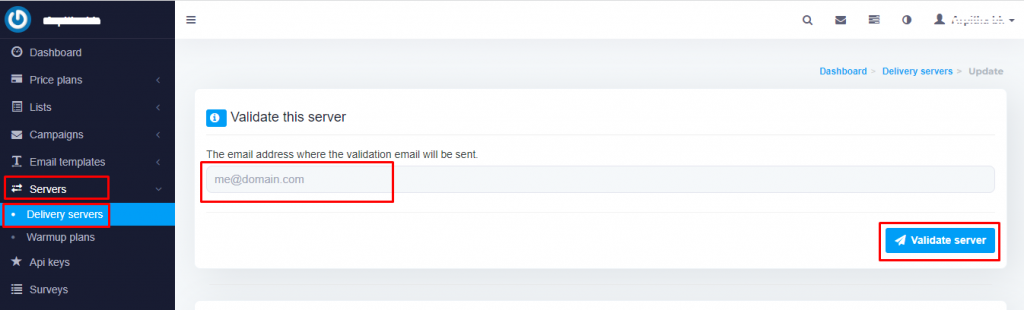
Step 5
After entering the server details, you need to validate the delivery server.
Enter the email address the verification will be sent to and click Validate server.
You will receive a confirmation email with a link to activate your delivery server.
Integrating SMTP2GO and EasySendy Pro should be an easy, quick and, hopefully, painless process. And going forward your email delivery should be outstanding.
You can access reports directly in your SMTP2GO dashboard, which will help you understand delivery successes and failures, tracking information and many more useful metrics. We’ve written some great articles outlining the features of your SMTP2GO account and we recommend taking the time to see everything we have to offer.
Should you need extra help from our award winning support team, we are almost always available to assist. You can find support contact details in your SMTP2GO dashboard and information about retrieving your support PIN here.
Ready for better email delivery?
Try SMTP2GO free for as long as you like:
Try SMTP2GO Free → Paid plans available for over 1,000 emails/month.