This guide provides step-by-step instructions on integrating SMTP2GO and Customer.io.
We have created an excellent migration guide to help you move to SMTP2GO from your existing provider.
Please also note that your sending domain needs to be verified in the Verified Senders section of your SMTP2GO dashboard. Ensuring your domain is verified will give SMTP2GO full permission to send email on your behalf, allow full digital signing of your email, and help make inbox placement a breeze.
Step 1
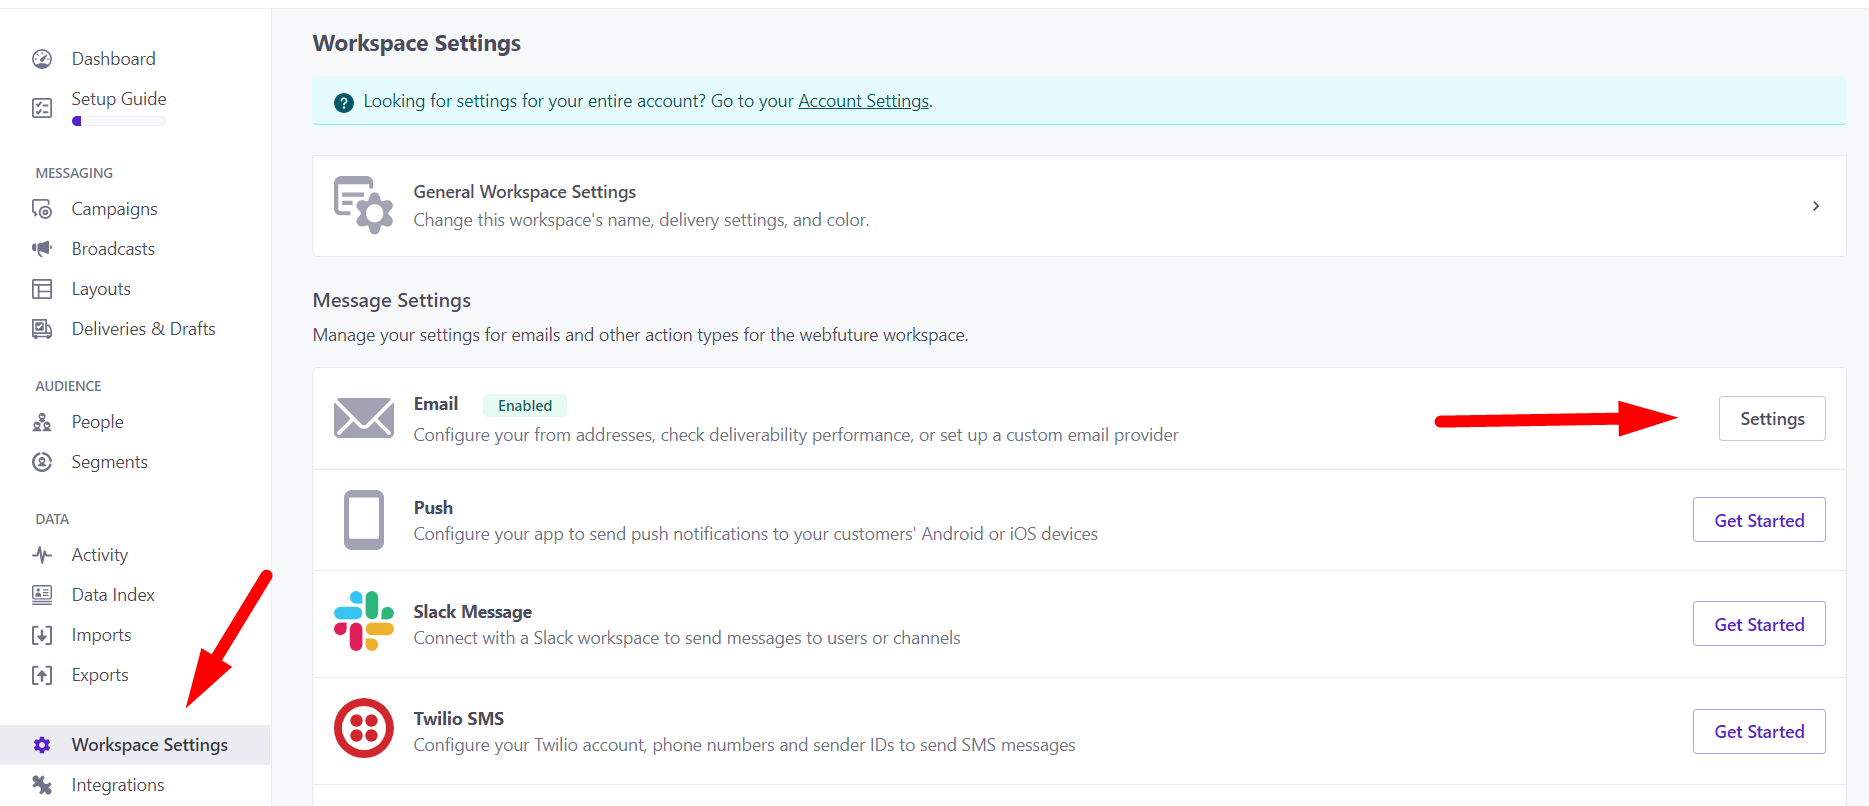
In your Customer.io dashboard go to the Workspace Settings section. In this section on the Email row click the Settings button.
Step 2
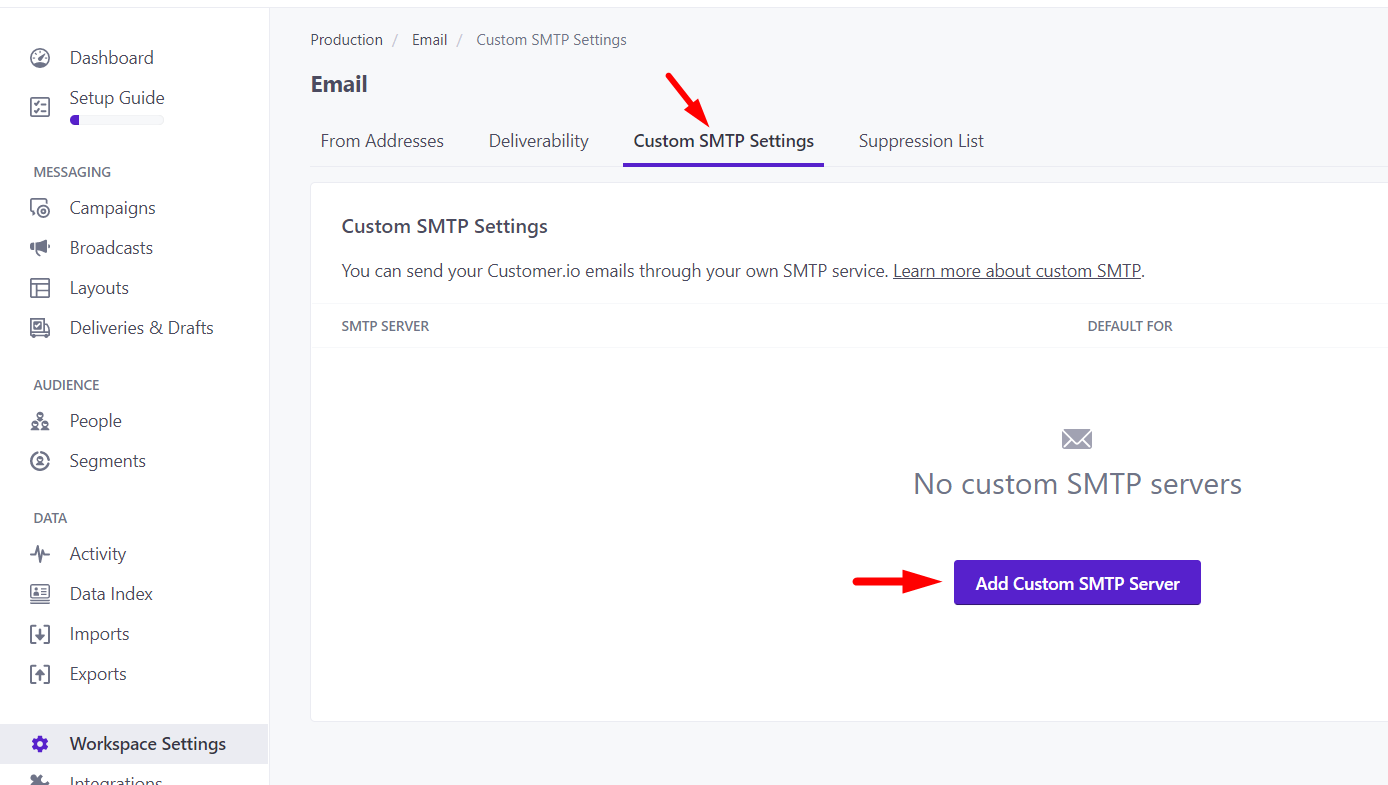
Go to Custom SMTP Settings and click the Add Custom SMTP Server button.
Step 3
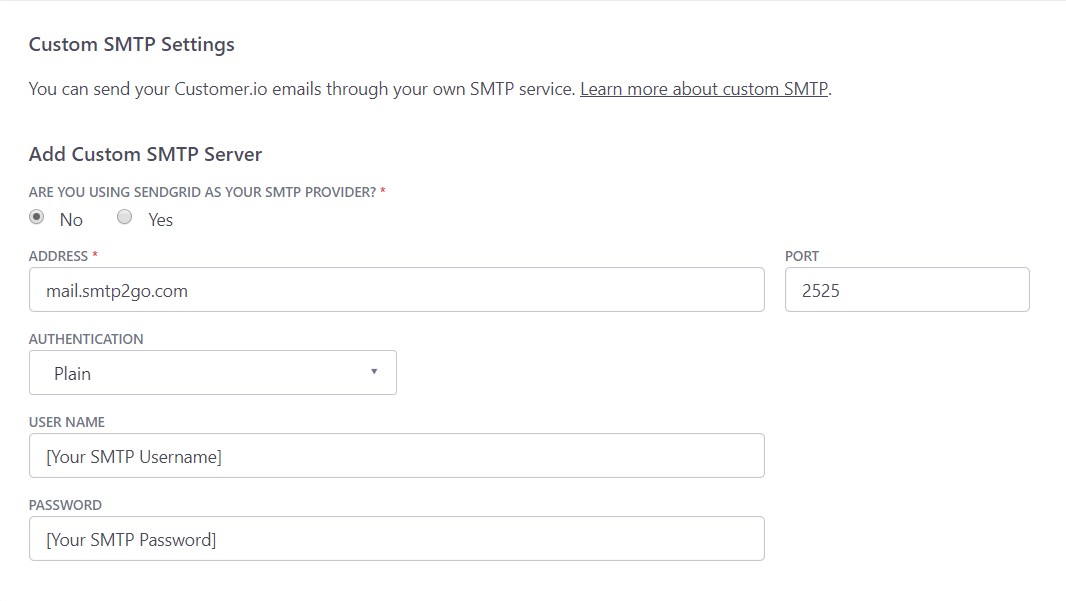
In the Add Custom SMTP Server section add the following details:
Address: mail.smtp2go.com
Port: 2525
Authentication: Plain
Username and Password: this can be found in your SMTP2GO dashboard under “Settings > Users”.
And that is it! Integrating SMTP2GO and Customer.io should be an easy, quick and, hopefully, painless process. And going forward your email delivery should be outstanding.
You can access reports directly in your SMTP2GO dashboard which will help you understand delivery successes and failures, tracking information and many more useful metrics. We’ve written some great articles outlining the features of your SMTP2GO account and we recommend taking the time to see everything we have to offer.
Should you need extra help from our award-winning support team, we are almost always available to assist. You can find support contact details in your SMTP2GO dashboard and information about retrieving your support PIN here.
Ready for better email delivery?
Try SMTP2GO free for as long as you like:
Try SMTP2GO Free → Paid plans available for over 1,000 emails/month.