These instructions cover the steps required to send email through SMTP2GO on the more recent Apple iOS mobile devices (ie, running the operating system iOS 12 and later).
These instructions will help you to:
– Set up a new SMTP2GO mail account on your device, and/or
– Change any or all of your existing mail accounts on your device, to take advantage of SMTP2GO’s superior delivery systems
While the screenshots below feature iPhone screens, the instructions are fundamentally the same for the newer iPads.
If you need specific assistance with a different iPhone or iPad version that does not align with these instructions, please reach out to our support team who will help further.
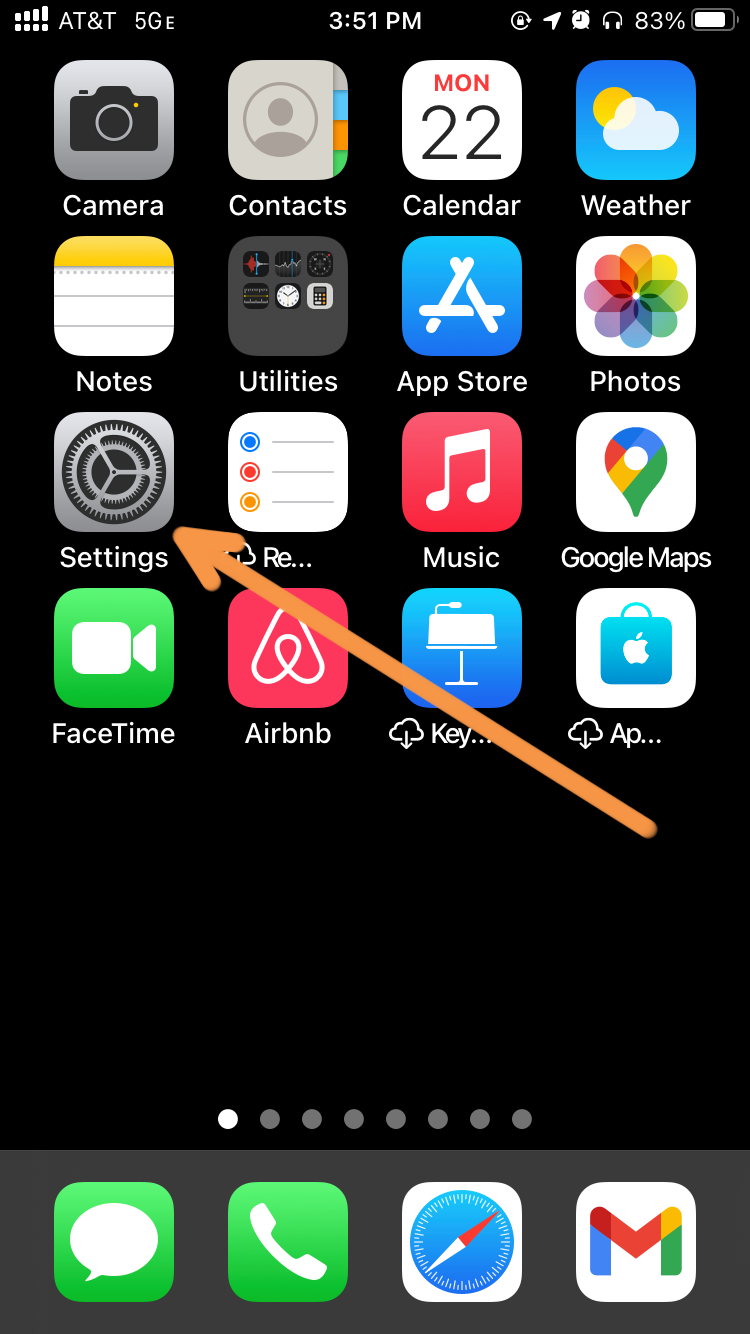
Step 1
To get into your mail accounts, you first need to select ‘Settings’ from the main screen in your iPhone:
Step 2
Next, from the “Settings” menu, choose “Mail“.
NOTE: If your phone is a little bit older, this may appear as “Passwords & Accounts“
Step 3
Within the “Accounts” menu, tap on “Add Account“.
Note – if you already have one or more email accounts set up on this device, and just want to change them to use SMTP2GO’s delivery servers, just tap on the account you wish to change, then scroll down to Step 9 below.
Step 4
This screen lets you choose which type of account to create. Here, tap on the “Add Mail Account” option shown under the “MAIL” heading.
NOTE – For older iOS devices, this may appear at the bottom of the list of “account types”, as “Other“
Step 5
This next page lets you choose which type of mail account you want to create. Here, tap on the small “Other” heading at the bottom.
(Note – For older iOS devices, this may appear instead as an “Add Mail Account” option.)
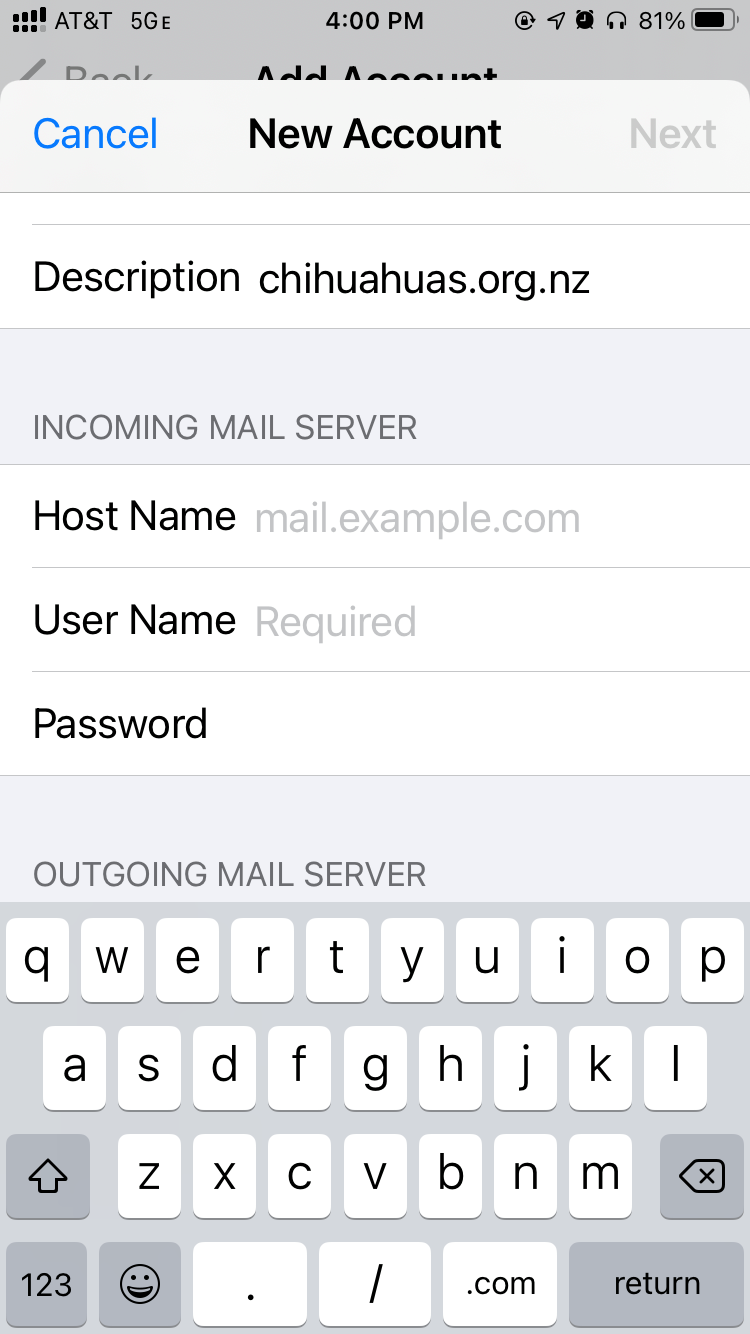
Step 6
In the ‘New Account‘ screen, enter your:
- Name (as you wish it to appear to others when they see emails you’ve sent them)
- Full email address
- Password for your inbound mail server
- Description (how you want the account to appear on your own Apple device)
The screenshot shows ‘Description’ as ‘chihuahuas.org.nz‘, but you can enter anything that’s meaningful to you.
When you have filled in these details, tap on the blue “Next” button at the top right of the screen.
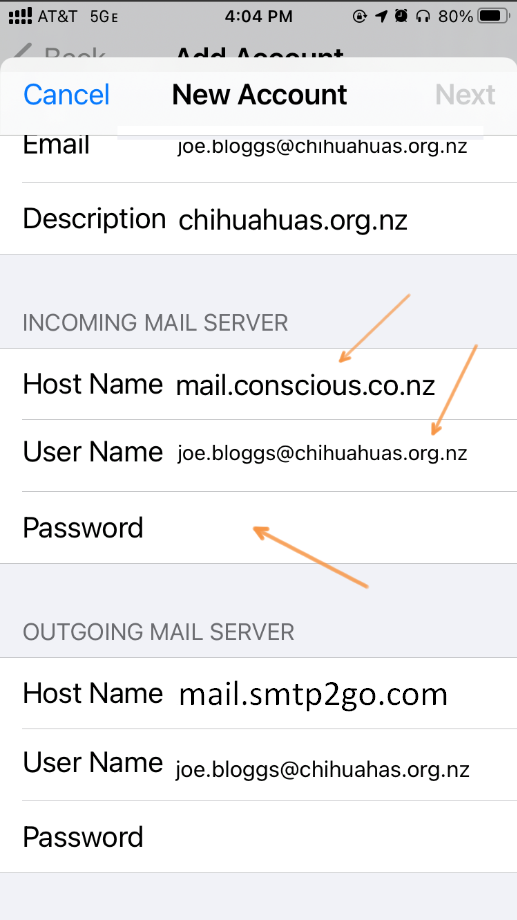
Step 7
With the next screen, you need to fill in the access credentials for both your inbound and outbound mail servers.
Note that with some services, the Username field may need to be your full email address.
Step 8
Firstly, in the “INCOMING MAIL SERVER” section, add in the Host Name, User Name and Password for retrieving your email from your inbound server.
Note – if you are simply updating an existing account to use SMTP2GO for outbound, skip this step.
When this is done, scroll the screen up to show the “OUTGOING MAIL SERVER” details.
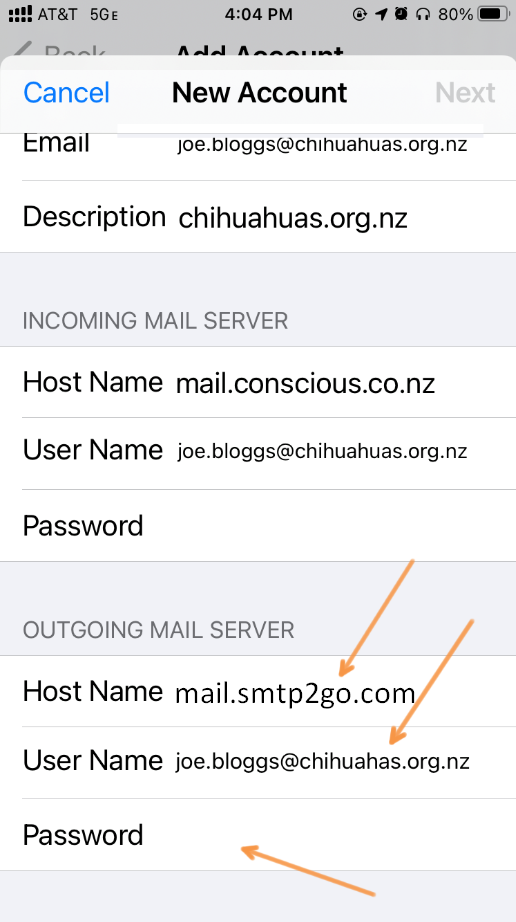
Step 9
In the “OUTGOING MAIL SERVER” section, add the following:
Host Name: mail.smtp2go.com
User Name & Password: a combination from your SMTP2GO account’s “Sending > SMTP Users” section.
Step 10
After completing these details, and tapping ‘Next‘, the device will attempt to verify these details.
In doing so, it will try to connect to both the inbound and outbound servers, and ensure the server and login details you have given are all correct.
If either the inbound or outbound server details are incorrect, the app will tell you, and won’t allow you to progress until you enter the right information.
But if both the inbound and outbound servers are successfully verified, the device will go to the final stage of the setup.
Step 11
If you see this screen, then your details have been successfully verified. All you need to do then is tap on the “Save” button to save the account.
Step 12
After you have saved this account, it will then appear in your list of mail accounts.
From this point, any emails you send through that account will be transmitted through SMTP2GO’s network.
Integrating Apple iOS mobile devices with SMTP2GO should be an easy, quick and, hopefully, painless process.
You can access reports directly in your SMTP2GO dashboard, which will help you understand delivery successes and failures, tracking information and many more useful metrics. We’ve written some great articles outlining the features of your SMTP2GO account and we recommend taking the time to see everything we have to offer.
Should you need extra help from our award-winning support team, we are almost always available to assist. You can find support contact details in your SMTP2GO dashboard and information about retrieving your support PIN here.
Ready for better email delivery?
Try SMTP2GO free for as long as you like:
Try SMTP2GO Free → Paid plans available for over 1,000 emails/month.