When you attempt to create a solution that supports e-mail in the SmartSolutions Center, a pop-up message appears warning you to run the e-mail setup on your printer before you run the solution. Currently, only the Scan to E-mail solution requires you to run the e-mail setup.
Step 1
To set up e-mail functionality with SmartSolutions on your printer, do the following:
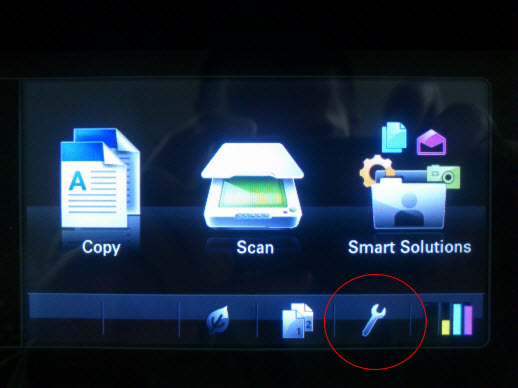
- Touch the icon on the printer home screen.
- Select E-mail Setup.
- Press Yes to launch the E-mail Setup Wizard.
Step 2
Enter your E-Mail Address and touch Continue. Follow the prompts on the touch screen.
Step 3
Change the SMTP Server setting to mail.smtp2go.com. Set the SMTP Port to 2525. You can also try using Server Port 25, 8025 or 587.
Select Plain or Plain TLS (if you wish to have a secure connection) from Authentication Type
Enter your SMTP2GO SMTP user name into E-mail User Name and your SMTP password into E-mail Password.
You will also need to make sure that you are sending from a domain name or an email address that you have registered with SMTP2GO.
Please note: some printers may still have a problem sending.
Some email applications, such as fax machines or printers, may ask you to enter an IP address instead of an SMTP server.
If your email application needs to connect to an IP address, please try connecting to 43.228.184.6 or 103.47.204.4
Ready for better email delivery?
Try SMTP2GO free for as long as you like:
Try SMTP2GO Free → Paid plans available for over 1,000 emails/month.