This guide helps to configure your web application running on IIS Web server, to use SMTP2GO as your outbound mail server. Please note that you should have already installed IIS Web server and SMTP Server Component on your server.
Step 1
Go to Start > All Programs > Administrative Tools > IIS 6.0 Manager. Locate the [SMTP Virtual Server #] node and open up the Properties dialog.

Step 2
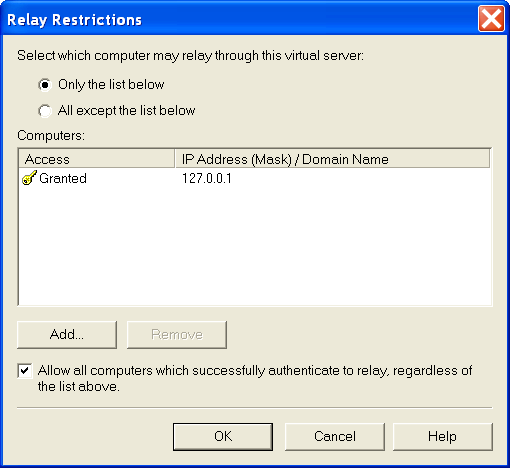
Click Access tab and click Relay button. Click Add button from Relay Restriction box. Add127.0.0.1 i.e. allow local machine to send email messages using your SMTP2GO Account. Click OK.
Step 3
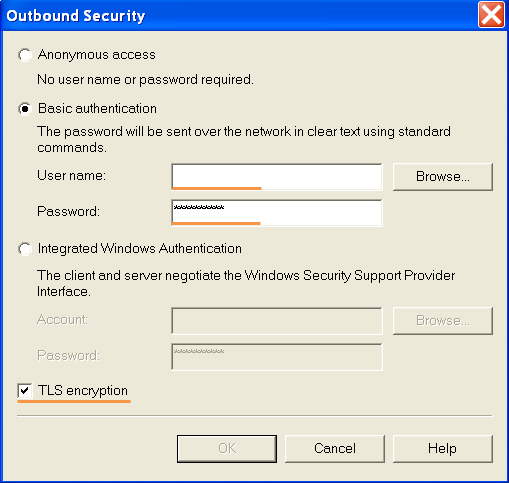
Click Delivery tab and click Outbound Security button.
Select Basic Authentication radio button.
Enter your SMTP2GO username into User name, and your SMTP2GO password into Password.
Enable TLS encryption. Click OK.
Step 4
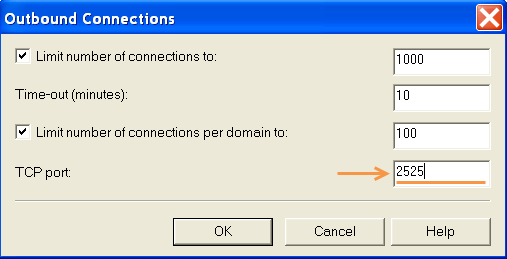
Click Outbound Connections button from Delivery tab.
Change TCP port Number to 2525. You can also try using Port Number 25, 8025 or 587. Click OK.
Step 5
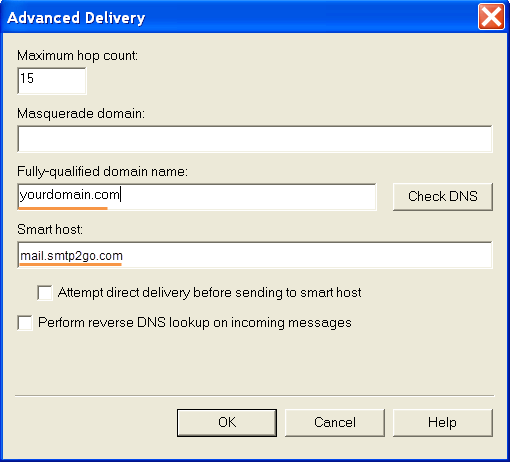
Click Advanced button from Delivery tab.
Enter mail.smtp2go.com into Smart Host.
Now you can close IIS 6 Manager and your application is configured to send outgoing email messages using your SMTP2GO Account.
Step 6
Some configurations will require the following additional steps:
Go to Start > All Programs > Administrative Tools > IIS 6.0 Manager. Locate the [SMTP Virtual Server #] node and open up the Domains dialog.
Set the route domain to forward to the Smart Host mail.smtp2go.com
Note: If you see an error ‘550 unable to verify sender address’ when trying to send an email after setting up, this means your ‘From’ email address doesn’t have a valid MX record setup yet. All emails must be sent from an email address that has an MX record at its domain name.
Ready for better email delivery?
Try SMTP2GO free for as long as you like:
Try SMTP2GO Free → Paid plans available for over 1,000 emails/month.